You can actually make the space above your kitchen cabinets both useful and attractive—no major remodel needed. Try plants, baskets, art, or stacked dishes to add color, texture, and hidden storage that fits your style and needs.
Pick a mix of one or two statement pieces and a few smaller accents so the area feels intentional, not just cluttered.

Think about how you actually use your kitchen and the mood you want—cozy and lived-in, sleek and modern, or farmhouse casual. Swap things out seasonally, keep heights varied, and use containers to hide less-attractive storage so the space stays tidy and stylish.
Key Takeaways
- Choose just a few statement pieces with smaller accents for balance.
- Match decor to your kitchen’s function and style.
- Rotate items and use containers to keep things neat and fresh.
Popular Decorative Ideas
Focus on pieces that add color, texture, and height. Stick to items that match your color palette and are easy to clean or move when needed.
Artwork and Framed Prints
Place low-profile frames or unframed canvas prints on top of cabinets to add color without crowding the workspace. Use 8×10 to 16×20 sizes for a layered look; mixing one large piece with a couple smaller ones creates balance.
Lean frames against the wall instead of hanging them—no holes, easy swaps. Prints with oilcloth or plexiglass glazing cut glare and weight.
Stick to food, landscapes, or abstract patterns that echo your kitchen colors. Anchor the display with a small stack of cookbooks or a narrow wooden box.
Leave a few inches between the cabinet crown and the bottom of the frame so dusting isn’t a nightmare.
Greenery and Potted Plants
If you can’t get natural light up there, go faux. Good silk or plastic pothos, ferns, and trailing ivy look real enough and don’t need water.
Put them in lightweight baskets or ceramic pots with drainage trays to protect the cabinet tops. If you do have light, try easy-care plants like pothos, snake plants, or small succulents in shallow planters.
Taller plants go at the back, trailing ones at the front or edge so they cascade. Group plants in odd numbers (3 or 5) for a balanced look.
Rotate or remove them if things get hot near the oven, and wipe leaves weekly to keep dust at bay.
Decorative Vases and Jars
Mix up heights and textures: tall glass vases, matte ceramic jars, woven baskets—they all work together. Use one tall centerpiece with two shorter items for a simple, curated vibe.
Leave vases empty or fill them with dried botanicals, wheat, or faux eucalyptus—no need for constant watering. Clear glass jars can hold seasonal decor like pinecones, dried citrus, or even string lights for easy updates.
Cluster groups on one side of a cabinet run, or spread single pieces out for rhythm. Pick colors that echo your backsplash or cabinet hardware to tie things together.
Choosing the Right Decor Style
Pick a style that works with your kitchen’s finishes, ceiling height, and how you actually use the space. Consider scale, color, and how often you want to clean or change things up.
Modern Minimalist
Go for clean lines and just a few items. Maybe one long, low-profile element like a slim row of matte vases or a linear LED shelf light.
Stick to neutral colors—black, white, gray, or a single accent that repeats elsewhere. Choose items that show intentional design, not clutter.
Arrange objects with breathing room, varying heights only a little. Use dust-free or easy-clean materials like metal, glass, or sealed ceramics.
Limit yourself to three to five pieces across long cabinet runs. For short runs, one bold item looks better than a bunch of small ones.
Farmhouse and Rustic
Pick warm, tactile stuff like woven baskets, wooden crates, and galvanized metal containers. Natural textures and worn finishes pair well with farmhouse cabinetry or open shelving.
Group objects in odd numbers and mix up the heights—a tall basket, a stack of vintage bowls, a low ceramic pitcher. Add faux or dried greenery for low-maintenance life and some height.
Stick to muted, earthy colors—creams, soft greens, warm browns. Use baskets or boxes for hiding seasonal stuff or rarely used bakeware so things stay tidy.
Traditional and Classic
Go for symmetry and balanced arrangements. Use matching pairs of decorative urns, classic pottery, or framed botanicals placed flat on the cabinet tops and leaned against the wall.
Pick refined materials: porcelain, brass, polished wood, glass. Repeat details from your kitchen hardware or molding to pull it all together.
Match the scale to your crown molding and ceiling height. For tall ceilings, add larger antique-style pieces; for lower ceilings, stick to a few medium-height items and don’t stack too high.
Eclectic Mix
Mix styles with intention—combine colors, shapes, and eras, but keep a unifying thread like a repeating color or a material such as matte black metal. That way, things don’t get chaotic.
Layer items: maybe a vintage sign behind a mid-century lamp and a cluster of small plants in different pots. Play with heights and textures, arranging little vignettes instead of one long line.
Change things up seasonally or whenever you find something you love. Choose mostly faux plants or easy-to-dust items so you’re not always cleaning.
Functional Items to Place Above Kitchen Cabinets
Use this space for stuff you need sometimes but not every day. Pick items that stay tidy, are easy to grab with a step stool, and fit your kitchen’s style and weight limits.
Cookbooks and Recipe Holders
Put cookbooks flat or upright in small groups so they don’t tip over. Lay heavy or rarely used books flat and stack them in twos or threes.
Bookends or trays keep pages in check and dust off covers every so often. Keep favorites at the front where you can reach them.
Add a recipe holder or a clipboard clipped to the cabinet crown for loose pages. Don’t crowd the space—too many books look messy and make things harder to grab.
If your kitchen gets steamy, store valuable or vintage books in a sealed box on top of the cabinets instead of leaving them out.
Extra Storage Baskets
Pick woven or lidded baskets sized to fit your cabinet tops. Baskets hide clutter and keep things from falling.
Label each basket with a simple tag—“Holiday Linens,” “Extra Napkins,” or “To-Go Containers”—so you know what’s inside without pulling them down. Stack low-profile baskets for stability.
Line baskets with fabric or a tray to protect delicate items and keep small things from dropping into the cabinet tops. Make sure they’re light enough to lift down safely.
If your kitchen’s humid or near a stove vent, use moisture-resistant materials. Swap contents seasonally so you don’t overload the space.
Wine and Beverage Racks
Mount a low-profile wine rack flush with the cabinet top or use a freestanding horizontal rack. Store bottles sideways to keep corks moist and labels facing out.
Don’t overload—just keep what the cabinet can support and you can lift safely. For glassware, use racks with secure slots.
Avoid tall stacks of heavy bottles; spread the weight across the cabinets. If you pour from here, keep a stable tray and microfiber cloth nearby.
Skip storing wine long-term above the cabinets if it gets hot or bright. If you want a decorative look, mix a few bottles with faux greenery or narrow baskets to soften things up.
Seasonal and Rotating Displays
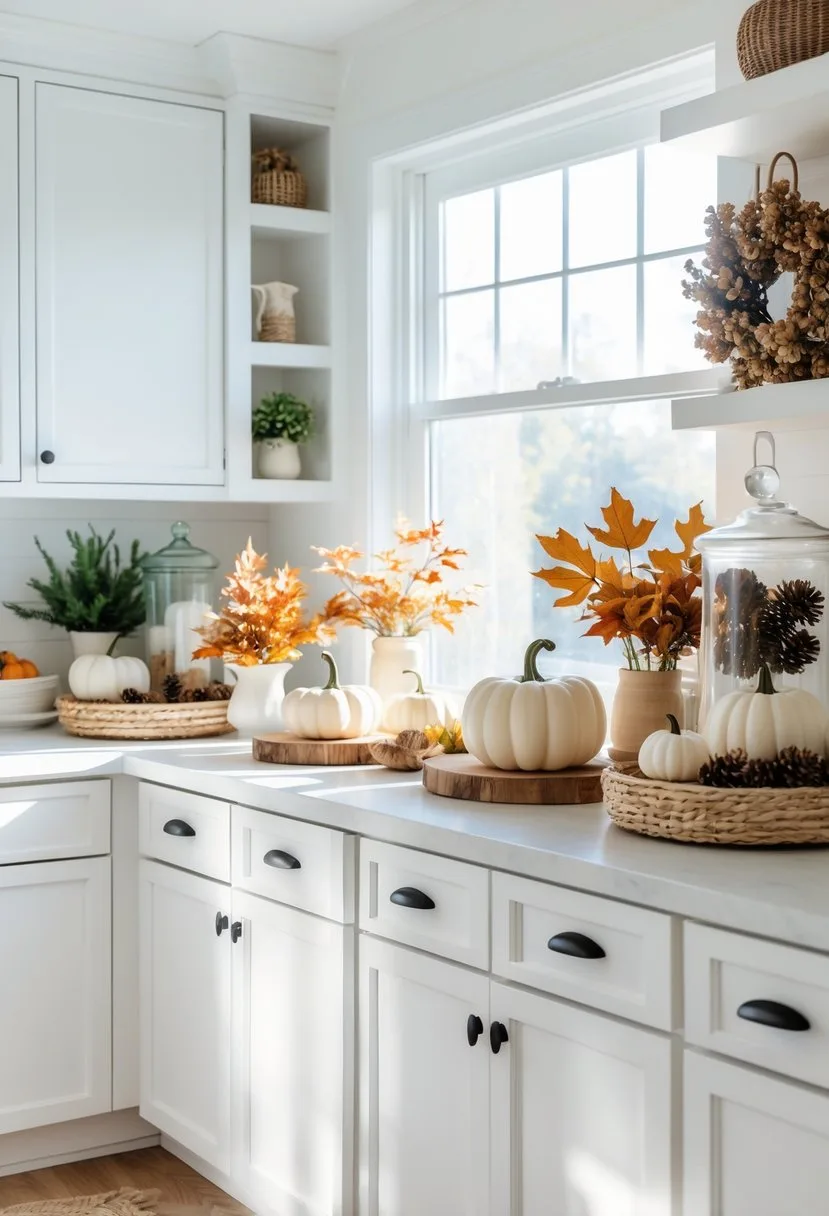
Switch things up every season to keep your kitchen feeling fresh. Stick with small, safe pieces that are easy to swap and store.
Holiday-Themed Arrangements
Pick a single color palette and three to five items to avoid clutter. For Thanksgiving, maybe a small wooden tray, two ceramic pumpkins, and a string of warm LED lights.
Set taller items at the back, smaller stuff in front so nothing blocks cabinet doors. For Christmas, swap to a green garland, a few glass ornaments in one color, and battery-operated candles.
Stick loose pieces down with clear museum putty so they don’t fall. For other holidays—Valentine’s, Easter, Fourth of July—choose one themed accent (a wreath, flag, or heart-shaped vase) plus matching small decor for a focused, tidy look.
Tips:
- Use neutral bases (baskets, trays) to anchor seasonal items.
- Keep breakables away from heat and steam.
- Store decorations in labeled bins for quick swaps.
Seasonal Flowers and Wreaths
Go faux if your cabinet tops don’t get much light or get hot. Good silk eucalyptus or pampas grass won’t fade.
Pop plants in baskets or low pots to add texture and hide the bases. Use wreaths flat against the wall or draped over a tall vase for fall and spring.
Swap blooms by season: dried grasses and deep tones for autumn, bright faux peonies for spring, evergreens for winter. Keep arrangements under 12 inches deep so they don’t crowd the space or block vents.
Care tips:
- Dust faux foliage monthly.
- Rotate just a piece or two at a time to keep things simple.
- Match pot colors to your kitchen trim for a pulled-together look.
Avoiding Common Styling Mistakes
Keep displays simple and easy to dust. Think about balance, scale, and how often you’ll need to clean or move things.
Overcrowding the Space
Don’t cram lots of little objects up there—it just looks messy. Pick two to four larger items instead of a dozen trinkets.
For example, use a tall vase, one basket, and a framed print rather than a parade of tiny figurines. Group items in odd numbers and vary heights for visual flow.
Set things on a tray or low shelf to anchor the arrangement. Leave negative space so your eyes can rest.
Match the scale to your cabinet height—tall pieces for high ceilings, lower ones for shallow gaps.
Ignoring Cleaning Challenges
Dust and grease pile up quickly up high. If you use real plants, pick ones that tolerate a little neglect, or stick with good faux foliage that wipes clean.
Skip delicate fabrics or porous ceramics that trap grime. Make a cleaning plan you’ll actually do: a quick wipe every couple of weeks and a deeper clean every few months.
Use easy-to-move containers and baskets so you can lift things down without breaking them. Label storage baskets so you don’t have to dig through the whole display just to find something.
Tips for Arranging and Layering Decor
Keep items at different heights. Mix materials and group pieces so the top of your cabinets feels intentional, not accidental.
Focus on balance and a clear focal point. Stick with easy-to-maintain things like faux plants or baskets—no need to make life harder.
Varying Heights and Textures
Start with a tall anchor piece—maybe a vase, lamp, or even a stack of cookbooks—placed off-center. Add mid-height stuff like framed art or a metal pitcher next to your anchor to keep the eye moving.
Fill the gaps with shorter things: trays, small bowls, or a bit of greenery. It doesn’t need to be fancy.
Mix up textures: woven baskets, matte pottery, metal bits, and faux greenery help break up the sameness. Use two or three different materials across the whole run so it feels curated, not like you just dumped everything up there.
Leave a little breathing room between groupings so each texture stands out. It’s tempting to cram it all in, but don’t.
Stick with lightweight, easy-to-move pieces to make cleaning less of a pain. If you’re into real plants, go for low-light varieties, or honestly, just cheat with good faux ones.
Groupings and Visual Balance
Group items in odd numbers—threes or fives just look better. Arrange each group with a clear focal object, two supporting pieces, and something grounding, like a tray or a low basket.
Play with the spacing. Tighter clusters work for small stuff, but give bigger items more room to breathe.
Repeat colors or materials here and there to tie the whole kitchen together. Maybe a basket over one cabinet, then another a couple cabinets down—simple but effective.
Keep heavier visual weight at the ends of the cabinets. Lighter things go in the middle, so it doesn’t look top-heavy.
Here’s a quick checklist:
- Is there a focal piece in each group?
- Got at least two textures per group?
- Odd number of items?
- Left some gaps for breathing room?
Creative Alternative Uses for Cabinet Tops
Cabinet tops don’t have to be dead space. You can actually make them useful, and even a little stylish, if you pick the right stuff and don’t just pile on clutter.
Lighting Fixtures
Mount warm LED strip lights along the back edge for soft, even light. Go for dimmable, low-profile strips—2700–3000K is a good cozy color temp.
Hide the wires behind crown molding or use adhesive cable channels if you don’t want cords everywhere. No one likes a messy install.
If you want something bolder, try puck lights or directional spotlights aimed down at the backsplash or shelves. Battery-operated or plug-in models save you from rewiring headaches.
Just make sure any fixture sits at least 3–4 inches away from anything flammable, and don’t cover vents or cabinet seams.
Display Collections
Group items by theme and height. Stack matching wooden bowls, line up three ceramic vases in different sizes, or prop up vintage recipe cards on little easels.
Keep the tallest piece in the back, shorter ones in front—makes sense, right? Limit yourself to five to seven items so it doesn’t get crowded.
Swap things out seasonally and mix up the materials—metal, glass, baskets, whatever feels right. If you have fragile stuff and the cabinets get bumped, use museum putty to keep things in place.
FAQs – What to Put on Top of Kitchen Cabinets
You can fill the gap above cabinets with plants, neat storage, or just a few bold pieces. Just match the scale of your kitchen and pick things you can actually move and clean.
How can I style the space above my kitchen cabinets in a modern way?
Keep it simple. Stick to neutral colors and just a handful of matching things—matte ceramic vases, a couple sculptural bowls, maybe a long planter with low faux succulents.
Group in threes or fives, leave space between. Lean a slim framed print or mirror against the wall if you want height without clutter.
What are effective methods to keep the tops of kitchen cabinets clean?
Dust and wipe every couple weeks—otherwise, grime builds up fast. Microfiber cloth and a mild cleaner do the trick, and a step stool makes it safer.
Put stuff on trays or in low baskets so you can move things and clean underneath without a hassle. Avoid anything too textured or fabric-heavy, since it just traps dust and grease.
What are some farmhouse-style decor ideas for above kitchen cabinets?
Go for woven baskets, old-school pitchers, and wooden crates for that rustic vibe. Toss in a ceramic crock or stack of vintage books for a little extra charm.
Add faux greenery like eucalyptus or olive stems in simple jugs—it keeps things looking lived-in but you don’t have to fuss with them. Stick to warm colors: creams, muted greens, natural wood.
How do I decorate the space above my kitchen cabinets for Christmas?
Pick a color theme—white and green, or maybe red and gold—so it looks pulled together. String one garland along the tops and tuck in battery fairy lights for a soft glow.
Add a few seasonal touches like mini wreaths, wooden stars, or ceramic houses. Spread them out for balance and use removable adhesive strips to keep everything in place.
What are some simple yet elegant ways to decorate above kitchen cabinets with high ceilings?
Scale up your decor—think taller vases, long garlands, or a row of big framed botanicals. Stagger the heights to draw the eye up.
Try a continuous element, like a long shelf or matching baskets, for a clean horizontal line. Limit your color palette to two or three shades for a polished, cohesive look.
How can I prevent grease buildup on the tops of kitchen cabinets?
Flip on your range hood every time you cook, especially if you’re frying. Make sure it actually vents outside—sometimes they just recirculate air, which isn’t much help.
Wipe down the tops of your cabinets right after heavy frying or baking. Grease comes off way easier when it’s fresh.
Try adding a thin coat of furniture polish or a washable sealant to finished wood. That way, next time you clean, grease won’t stick as much.
Skip putting fabric or anything porous up there. Those just soak up the grease and make things messier.

Jen Moser is a skilled kitchen and bath designer at Wisconsin Building Supply in Appleton, WI, and the author behind the expert remodeling and design content on Vivyro.com. With years of hands-on experience in residential cabinetry, layout planning, and functional aesthetics, she shares practical tips, innovative ideas, and inspiring transformations to help homeowners create beautiful, efficient kitchens and bathrooms that suit their lifestyle and budget.
As the creative voice of Vivyro.com, Jen draws from her professional expertise to offer step-by-step guidance, trend insights, and real-world solutions for remodeling projects. Her approachable, detail-oriented style empowers DIY enthusiasts and homeowners alike to achieve professional-quality results in their own spaces.